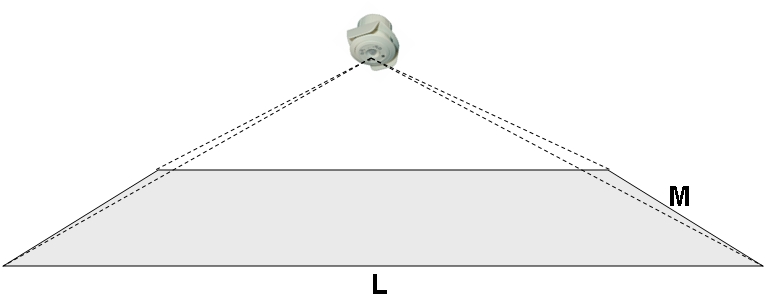
1.) Orient the rectangular coverage area properly. Since most rooms are rectangular, the ecos sensors offer a rectangular coverage area. To facilitate the orientation of this area to best suit your requirments, a rectangular symbol is imprinted on the front of each sensor. The actual size of the coverage area depends on installation height and can be looked up in the table on each data sheet. Rotate the sensor in the ceiling to match the coverage area to your application.
2.) Reduce the size of the coverage area if necessary (exclude sources for false triggering). All models in the 5 meter range offer a flexible coverage area reduction feature. They have a pull-out shading lense around the digital sensors head. When pulled out completely, the coverage area is reduced to about 60%. In this way you can exclude e.g. persons walking along a corridor past your office door who might trigger the sensor unintendedly.
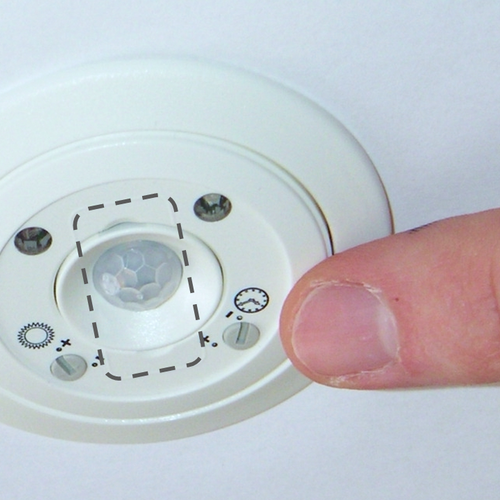
3.) Set delay time and light level. These settings are depending on each specific model (please refer to the data sheets). As a guideline for the time setting several minutes are recommended, mainly due to the perceived lighting atmosphere and lighting comfort. Especially when you switch fluorescent lighting the delay time should be close to 10 minutes - this is the duration for the ON periods recommended by the tube manufacturers in order to ensure that the tube can heat through whenever turned on and that the contained mercury can disperse evenly across the tube.